Roles and permissions
A role is a named set of permissions for account members. Open “Team” in the “Profile” menu and click “Manage roles”. Users with “View” permission for the “Team” section can view this screen.
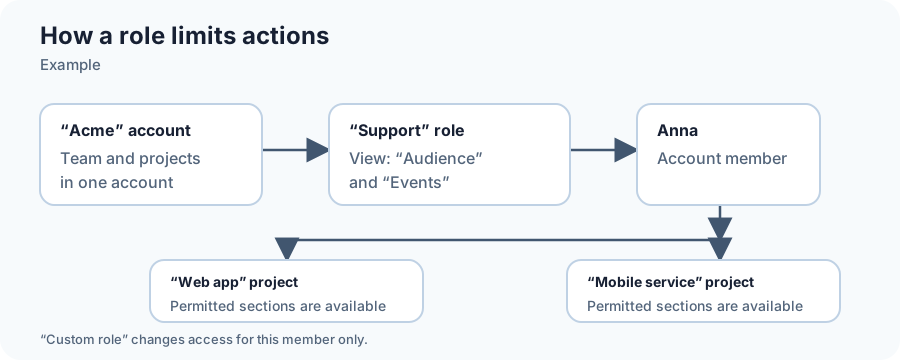
A role is assigned to an account member. It determines access to sections in that account's projects.
System owner and initial roles
“Owner” is a system role. The owner has every action in every section, and this role cannot be changed, restricted, assigned to another member, or deleted.
A new workspace has three initial roles:
- “Administrator” — all permissions except ownership.
- “Editor” — “Create”, “View”, and “Edit” for content sections and “Events”; “View” and “Edit” for “Widget”; “View” for “Connect the widget”, “Audience”, and “Analytics”.
- “Viewer” — only “View” for content sections, “Widget”, “Audience”, “Events”, and “Analytics”.
You can edit the initial roles in the same way as manually created roles.
Create or edit a role
- Click “Create role” or select a role in the “Roles” list.
- Fill in the required “Role name”: unique, non-empty text of no more than 80 characters. Names that differ only in capitalization or leading or trailing spaces are treated as identical.
- Optionally fill in “Description”: text explaining the role's purpose, no more than 240 characters.
- Select the permissions you need in the matrix. You can choose any combination of “Create”, “View”, “Edit”, and “Delete” for the available sections; it defines access for members with this role.
- Click “Save role”.
For example, create a “Support” role, enable “View” for “Audience” and “Events”, and save it. Once assigned, the member will see these sections but cannot change data without “Edit” permission.
Creation requires “Create” permission for the “Team” section; editing requires “Edit”. A member who is not the owner can save only a permission set no broader than their own; they also cannot edit a role assigned to themselves. An available interface control does not bypass this check.
Permission matrix
The matrix lets you enable four actions for each section: “Create”, “View”, “Edit”, and “Delete”.
- “Content” group: “Updates”, “Popups”, “Checklists”, “Tours”, “Hints”, “Text replacement”, “Feedback”.
- “Channels” group: “Widget”, “Connect the widget”.
- “Data and administration” group: “Audience”, “Events”, “Analytics”, “Team”.
“View” determines whether the corresponding section is available in the user's menu. Permissions for members, invitations, and roles are in the “Team” row: “Create” covers invitations and role copies, “Edit” covers member access and existing roles, and “Delete” covers members and roles that are not in use.
Named and custom roles
You select a named role for a member in the “Role” field on the “Team” screen. When this role changes, Flowtomate applies its new permission set to all members assigned to it.
If you change the permission matrix in a member's card, they are assigned a “Custom role”. This is a separate permission set with no link to a named role: later changes to the shared role do not affect it. See Team for assigning roles and configuring a custom role.
Duplicate or delete a role
To create a starting point for a new role, open an existing role and click “Create copy”. Flowtomate creates a copy of its current permissions. This requires “Create” permission for the “Team” section.
To delete a role, click “Delete role” and confirm deletion. This requires “Delete” permission for “Team”. A role cannot be deleted while it is assigned to at least one member. First assign those members another named role, or change their permission matrices individually so that they have a “Custom role”, and save the changes. Then delete the role.
If you start editing a role and then select another role, “Team”, “Create role”, “Cancel”, “Create copy”, or deletion, Flowtomate shows “Discard changes?”. Choose “Keep editing” to retain the draft or “Discard changes” to continue without it.
Related articles
- Team — assign a named or custom role to a member.
- Getting started — sign in to the required workspace and project.
- Troubleshooting — if a member cannot access a section or action.